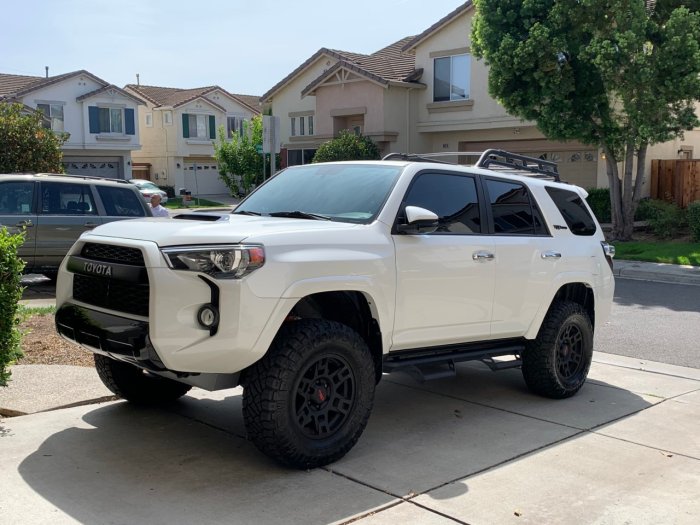
How to Install a Lift Kit on Your Toyota 4Runner – Elevating your Toyota 4Runner’s capabilities often involves installing a lift kit. This detailed guide provides a comprehensive walkthrough of the process, covering various kit types, necessary tools, safety precautions, and potential challenges. Whether you’re aiming for a subtle lift or a significant increase in ground clearance, understanding the intricacies of this modification is crucial for a successful and safe installation.
Source: 4rstatic.net
Choosing the Right Lift Kit for Your 4Runner
The first step in lifting your 4Runner is selecting the appropriate lift kit. Several types cater to different needs and budgets:

Source: roughcountry.com
Types of Lift Kits:, How to Install a Lift Kit on Your Toyota 4Runner
- Body Lift Kits: These kits lift the body of your 4Runner relative to the frame, offering a relatively inexpensive and straightforward installation. However, they don’t improve suspension articulation or off-road performance as significantly as other types.
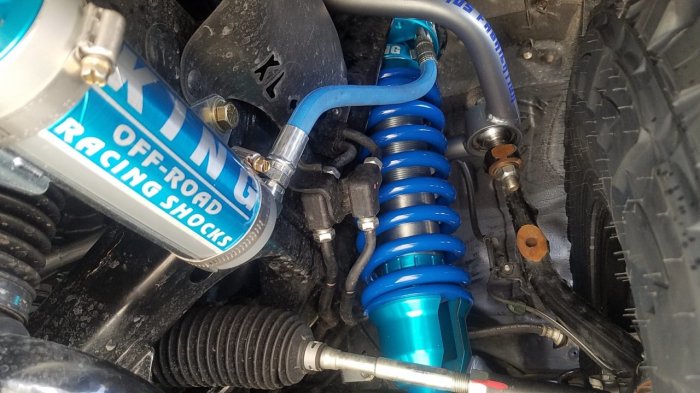
- Suspension Lift Kits: These kits replace or augment your 4Runner’s suspension components, providing improved ground clearance, articulation, and ride quality. They are more complex to install and generally more expensive than body lift kits. Sub-categories include:
- Spacer Lifts: These are the simplest suspension lifts, using spacers to increase the ride height. They are generally less expensive but offer less articulation than other suspension lifts.
- Coil Spring Lifts: These kits replace the factory coil springs with taller ones, offering increased lift height and improved ride quality compared to spacer lifts.
- Leaf Spring Lifts (for older models): Some older 4Runners utilize leaf springs in the rear suspension. Lift kits for these models replace the leaf springs with taller ones, offering a significant lift.
- Long-Travel Suspension Kits: These are the most advanced and expensive kits, offering significantly improved suspension articulation and off-road performance. They often involve replacing shocks, control arms, and other components.
Consider your budget, desired lift height, and intended use when selecting a kit. A higher lift height generally requires more extensive modifications and may impact your 4Runner’s handling and stability. Research specific kits from reputable manufacturers like Old Man Emu, Dobinsons, and ICON Vehicle Dynamics to find the best fit for your needs and 4Runner’s year and model.
Tools and Equipment Needed
Before beginning the installation, gather all necessary tools and equipment. This will ensure a smooth and efficient process. Having everything readily available saves time and frustration.
- Jack and jack stands (sufficient capacity for your 4Runner’s weight)
- Wheel chocks
- Socket set (metric and SAE, depending on your 4Runner’s year)
- Wrench set (metric and SAE)
- Torque wrench
- Ratchet and extensions
- Pry bar
- Hammer
- Penetrating oil (like PB Blaster)
- Shop manual specific to your 4Runner’s year and model
- Lift kit components
- Alignment tools (optional, but highly recommended)
Step-by-Step Installation Guide (General Overview – Consult Your Kit’s Instructions!): How To Install A Lift Kit On Your Toyota 4Runner
This is a general overview. Always refer to your specific lift kit’s instructions, as the process can vary significantly depending on the kit’s design and your 4Runner’s year and model. Improper installation can lead to safety hazards and damage to your vehicle.
Preparation:
- Securely park your 4Runner on a level surface and engage the parking brake.
- Consult your 4Runner’s repair manual for specific torque specifications and component locations.
- Gather all necessary tools and equipment.
- Take photos of the existing suspension components before disassembly to aid in reassembly.
Installation (General Steps):
- Disconnect the battery’s negative terminal. This prevents electrical shorts.
- Safely lift and support your 4Runner using a jack and jack stands. Never work under a vehicle supported only by a jack.
- Remove relevant suspension components according to your kit’s instructions. This may involve removing shocks, springs, control arms, or other components.
- Install the new lift kit components, following the manufacturer’s instructions carefully. Pay close attention to torque specifications.
- Reassemble the suspension system, ensuring all components are correctly installed and tightened to the specified torque.
- Lower your 4Runner from the jack stands.
- Check for proper clearance and alignment. Unusual noises or handling issues may indicate improper installation.
- Get a wheel alignment to ensure optimal handling and tire wear.
Addressing Potential Challenges
During installation, you might encounter challenges such as rusted bolts, stripped threads, or difficulty accessing certain components. Using penetrating oil and appropriate tools can help overcome these obstacles. If you encounter significant difficulties, consider seeking professional assistance.
Post-Installation Considerations
After installing your lift kit, several crucial steps are necessary to ensure your 4Runner’s safety and performance:
- Wheel Alignment: A proper wheel alignment is crucial after any suspension modification. This prevents uneven tire wear and improves handling.
- Calibration (if applicable): Some lift kits may require calibration of your 4Runner’s electronic systems. Consult your kit’s instructions or a qualified mechanic.
- Test Drive: Perform a thorough test drive to assess the handling and stability of your lifted 4Runner. Be cautious and aware of any unusual noises or vibrations.
- Inspect Regularly: Regularly inspect all suspension components for wear and tear, especially after off-road driving.
Frequently Asked Questions (FAQ)
- Q: How much does a lift kit cost? A: The cost varies significantly depending on the type of kit, brand, and lift height. Expect to pay anywhere from a few hundred dollars to several thousand dollars.
- Q: Will a lift kit void my warranty? A: Modifying your vehicle may void certain aspects of your warranty. Check your warranty documentation and consult with your dealership.
- Q: Do I need to change my tires after installing a lift kit? A: Often, yes. Larger tires are often necessary to maintain proper wheel well clearance and prevent rubbing.
- Q: How much lift can I safely install? A: The safe lift height depends on various factors, including your 4Runner’s year and model. Excessive lift can negatively impact handling and stability. Consult your kit’s instructions and a qualified mechanic.
- Q: Can I install a lift kit myself? A: While possible, it’s a complex process requiring mechanical skills and the right tools. If you lack experience, it’s recommended to seek professional assistance.
Conclusion
Installing a lift kit on your Toyota 4Runner is a significant modification that can enhance its off-road capabilities and appearance. However, it requires careful planning, the right tools, and a thorough understanding of the process. By following these steps and consulting your kit’s instructions, you can successfully complete the installation and enjoy the benefits of a lifted 4Runner. Remember safety first!
Source: 4rstatic.net
References
- Toyota Official Website (For general vehicle information)
- 4Runner Forums and Community (For user experiences and advice)
- [Insert links to specific lift kit manufacturer websites]
Call to Action
Ready to take your 4Runner to the next level? Browse our selection of high-quality lift kits today and unlock your vehicle’s full potential! [Link to product page]
FAQ Insights
What type of lift kit is best for my 4Runner?
The best lift kit depends on your budget and intended use. Consider body lifts (simpler, less expensive), suspension lifts (better performance), or a combination. Research specific kits designed for your 4Runner’s year and model.
Do I need special tools for this installation?
Yes, you’ll need a variety of tools, including wrenches (metric and standard), sockets, jack stands, a torque wrench, and possibly a press for some components. A detailed list should be included with your chosen lift kit instructions.
How important is proper alignment after installation?
Crucial. A lift kit alters your suspension geometry. Improper alignment can lead to uneven tire wear, poor handling, and potential safety hazards. Professional alignment is strongly recommended after installation.
What about warranty implications?
Installing a lift kit may void certain parts of your vehicle’s warranty, particularly those related to the suspension system. Check your warranty documentation and consult with your dealership before proceeding.